Hi there! Today I wanted to talk about a very popular product to sell in Artist Alleys: Buttons! Buttons are pretty quick and easy to make, and sell well at every convention I’ve ever sold at. The cost of buying a button maker is usually between $200-$500, which can be an impossible amount to invest in when you’re first starting out. Luckily there’s a lot of websites out there that offer custom button services for those of you who want to sell buttons, but don’t have the money, or time to make buttons yourself. I’m one of those website. *waves* You can find the link to samples and prices for the custom buttons I offer in the navigation menu under Services. *smiles* Throughout the rest of this post I’ll walk you through how to take artwork you’ve already made, and format it into a button design. To be able to utilize this tutorial you’ll need to have a finished piece of art, and access to Photoshop or a similar program. Are you ready?
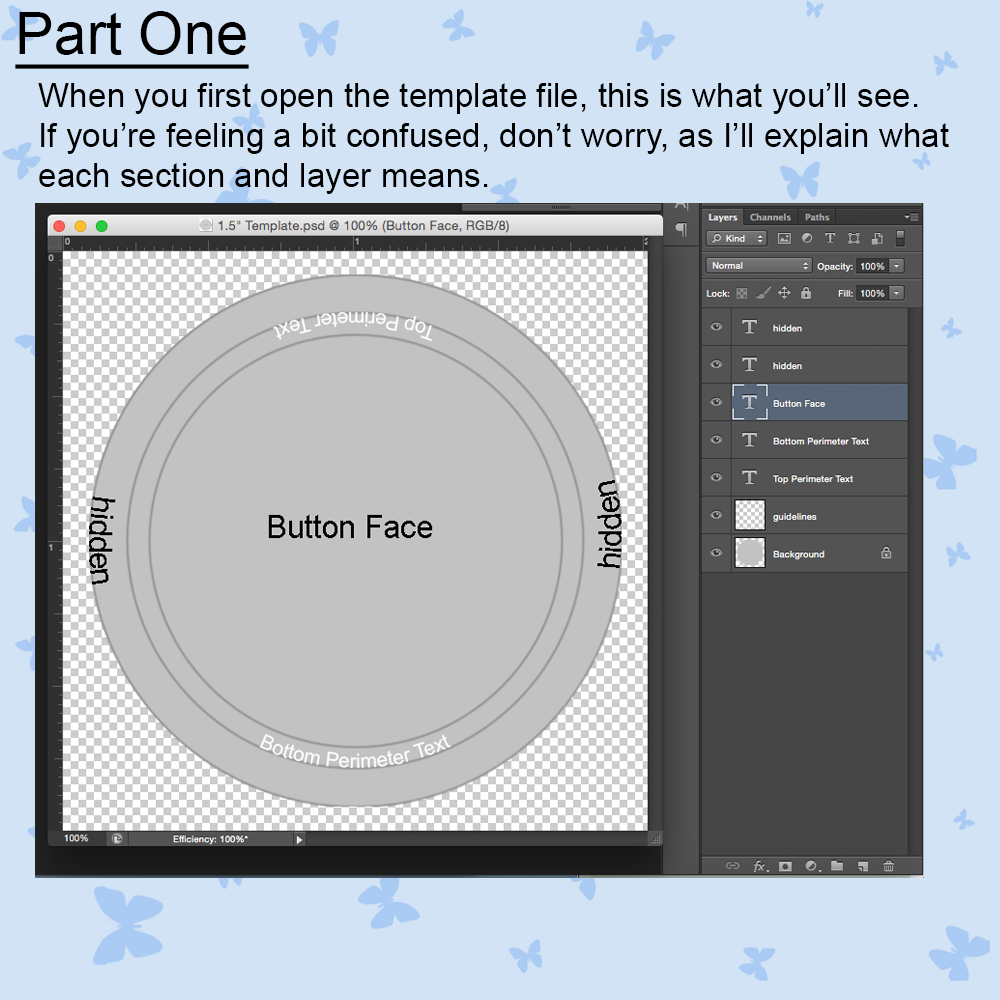
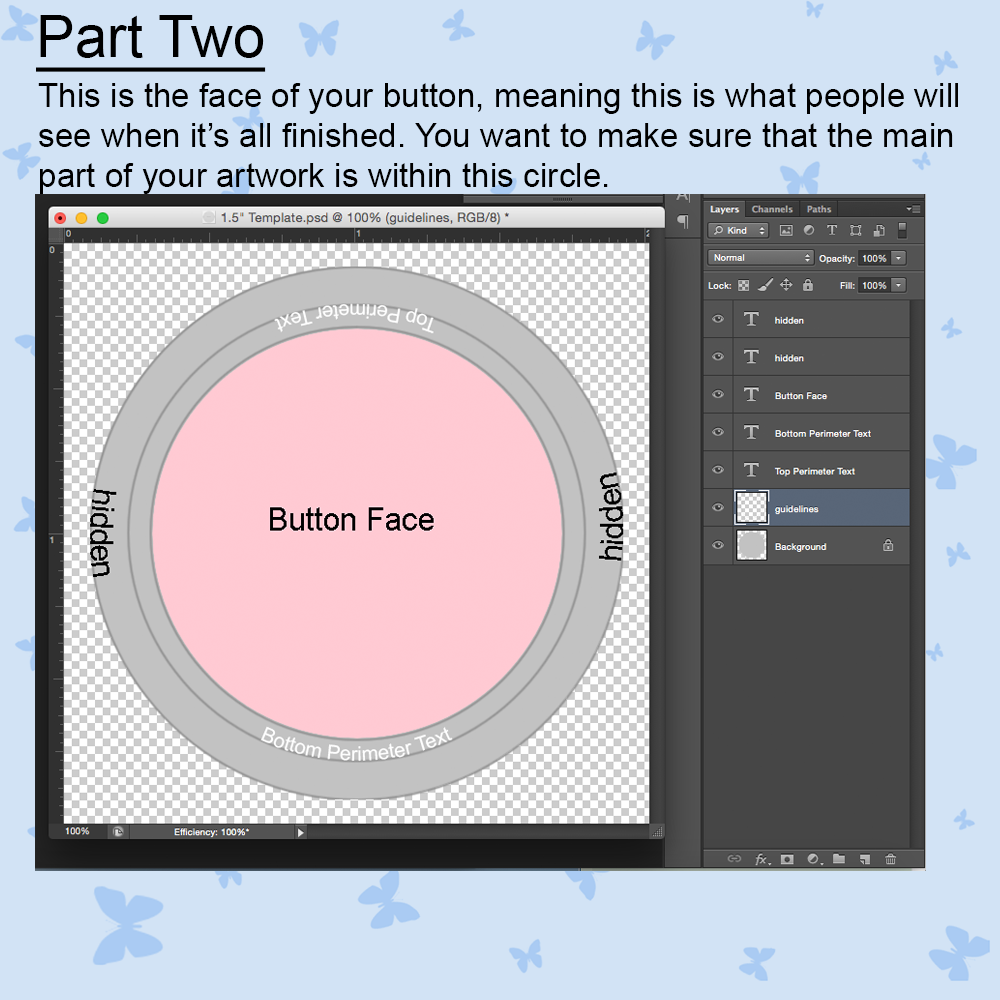
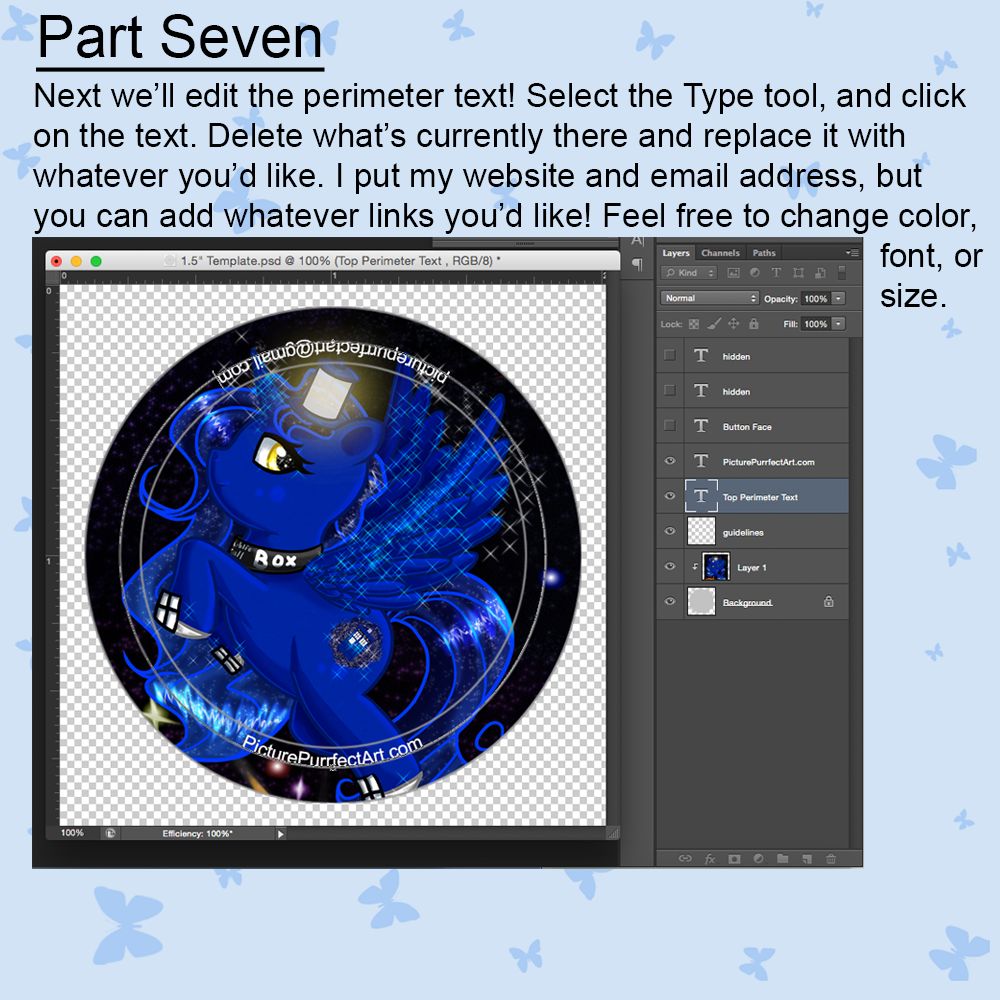
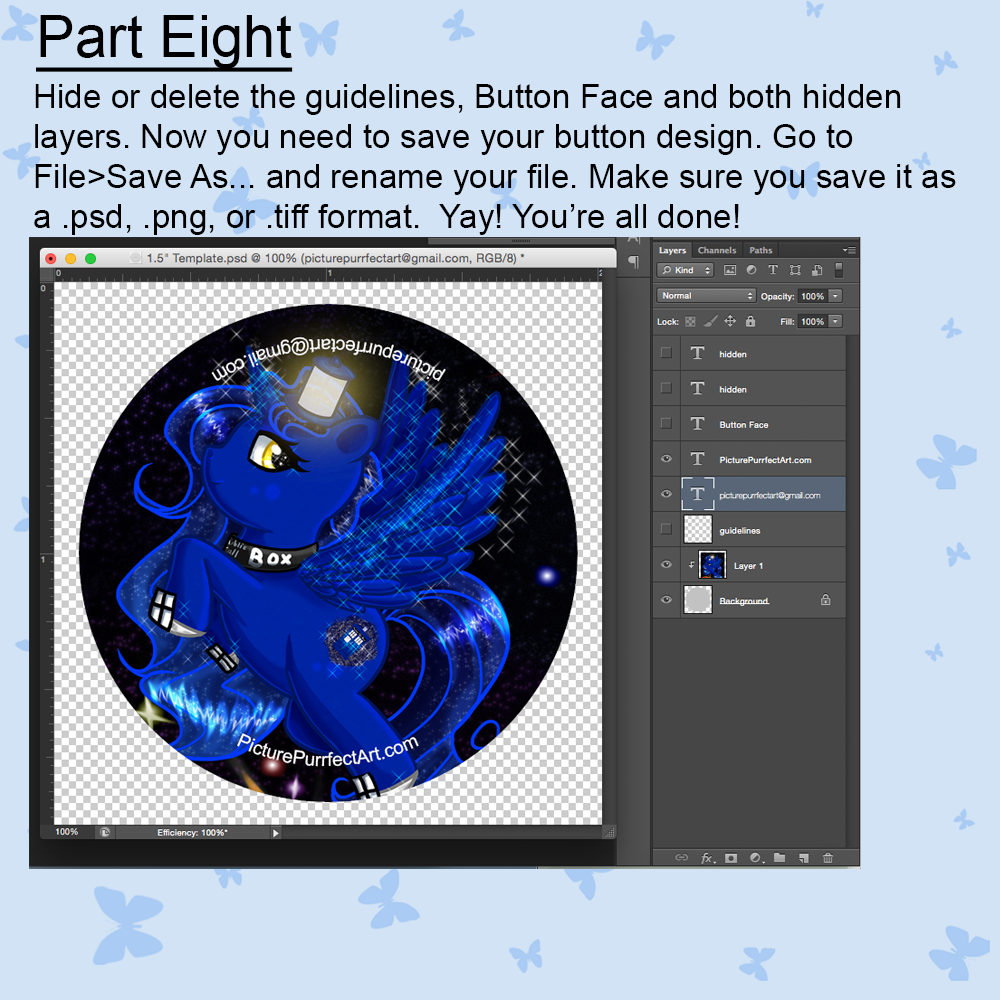
To start off you’ll need to decide what size buttons you want to make. I currently have templates for 1.5″ buttons, and 3.5″ buttons. This tutorial was made using the template for the 1.5″ buttons. The 3.5″ template looks slightly different, but works in the same way. You can download the templates below.
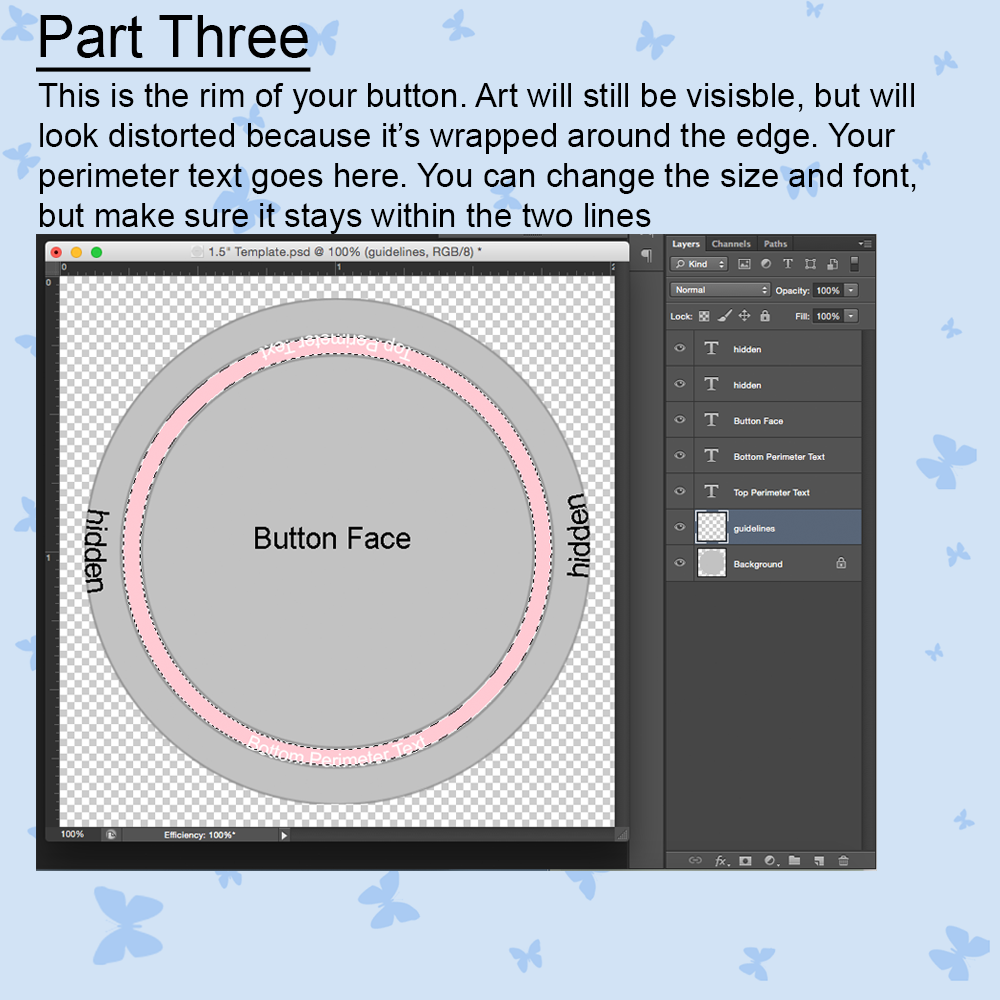
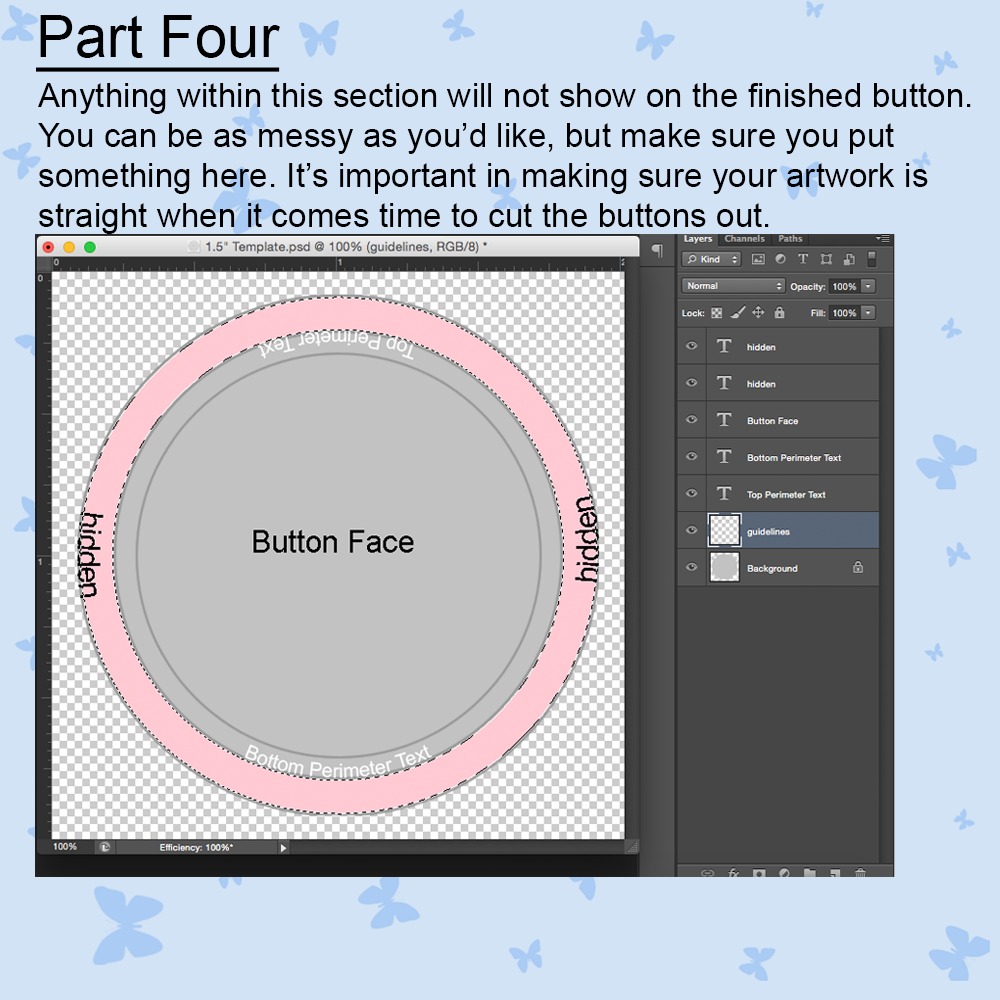
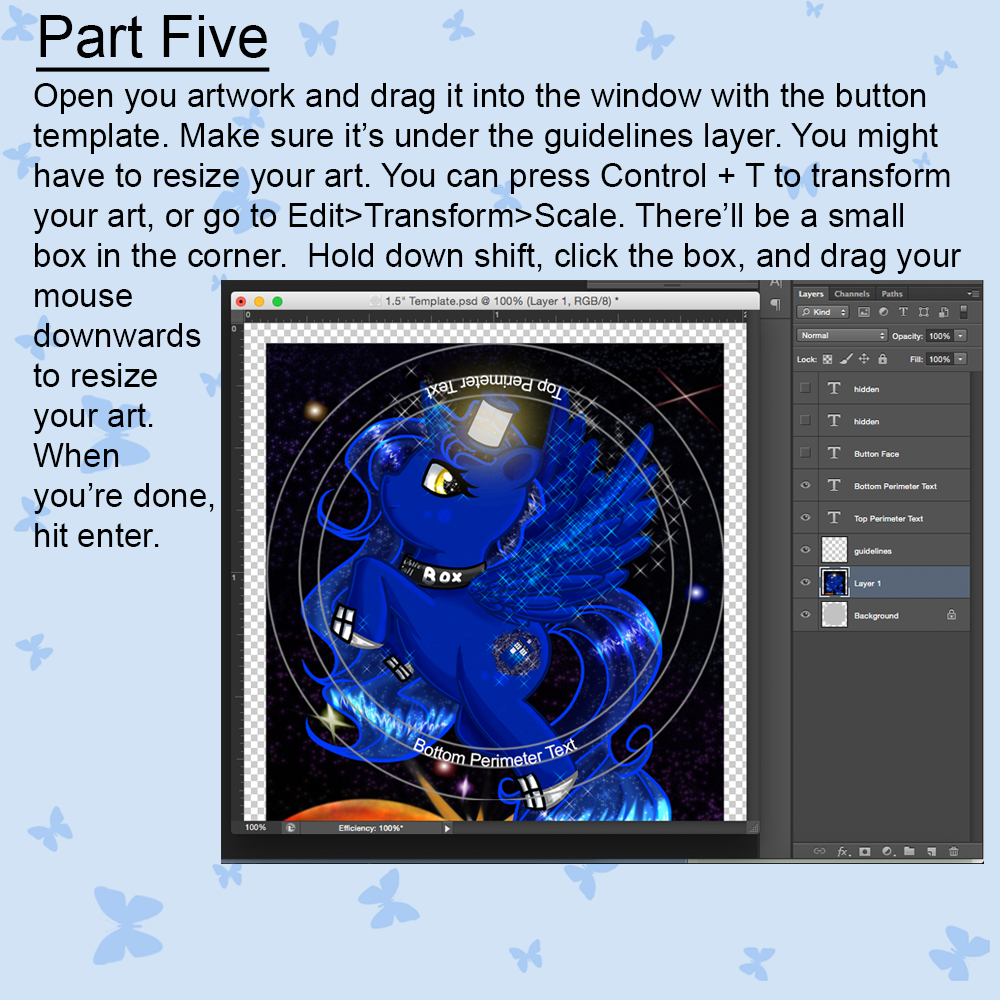
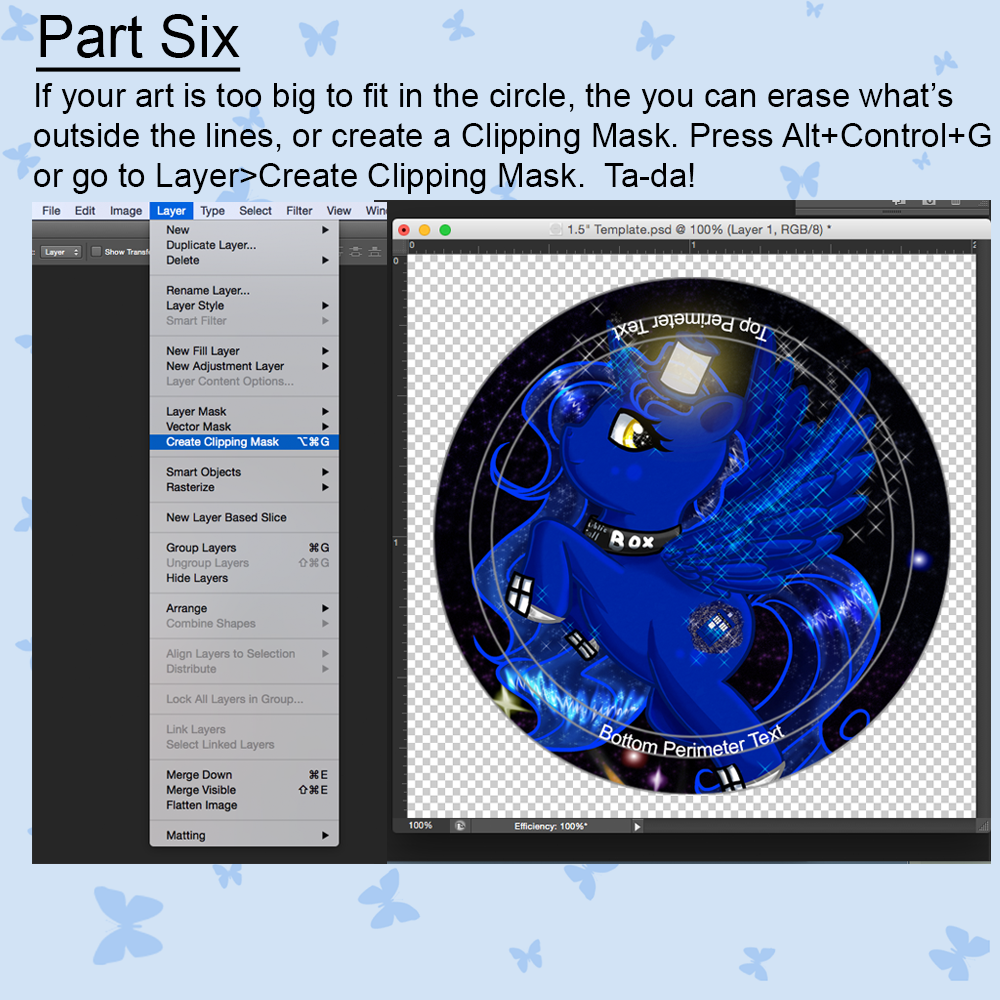
Now that you have your chosen template, we’re ready to start.
Woohoo! Now we’re all done. *smiles* For those of you who want to order custom buttons from me, you now have a finished file that I can easily print out and press into an awesome new product. For those of you who are planning to, or have already bought a button maker of your very own, I’ll be making another tutorial on how to take the file you made today and prepare a sheet of buttons, and I’ll also walk you through on how to actually prep and press your own buttons.
If you have any questions, or comments, please leave me a comment and let me know! <3
Leave a Reply